Soldering Tip
As your DIY builds become more complex, you’ll might need more than one soldering tip for your projects. However, with so many types available choosing the right one can be confusing.
Here we give you an overview about the most common soldering tips and their applications.
You should pick a soldering iron from a reliable manufacturer, that offers multiple replacement tips. It's a good idea to use original tips for your iron, as not every tip works with every soldering iron and quality is absolute key.
Furthermore you should select tips which are made for lead-free soldering, more about this topic in the solder wire section.

Here is a overview of different types of solder iron tips
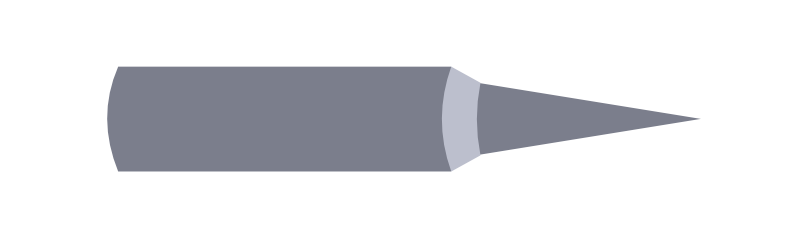
Chisel Tip
The most versatile and widely used shape.
A chisel tip has a flat, screwdriver-like end that offers excellent heat transfer due to its broad contact area. This makes the chisel tip the best tip for people starting with synth DIY.
It's ideal for through-hole components, header pins, wires, and desoldering with braid. The flat edge allows for even heating across pads and leads. For general electronics work, a 1.2–2 mm chisel tip is often the best starting point.

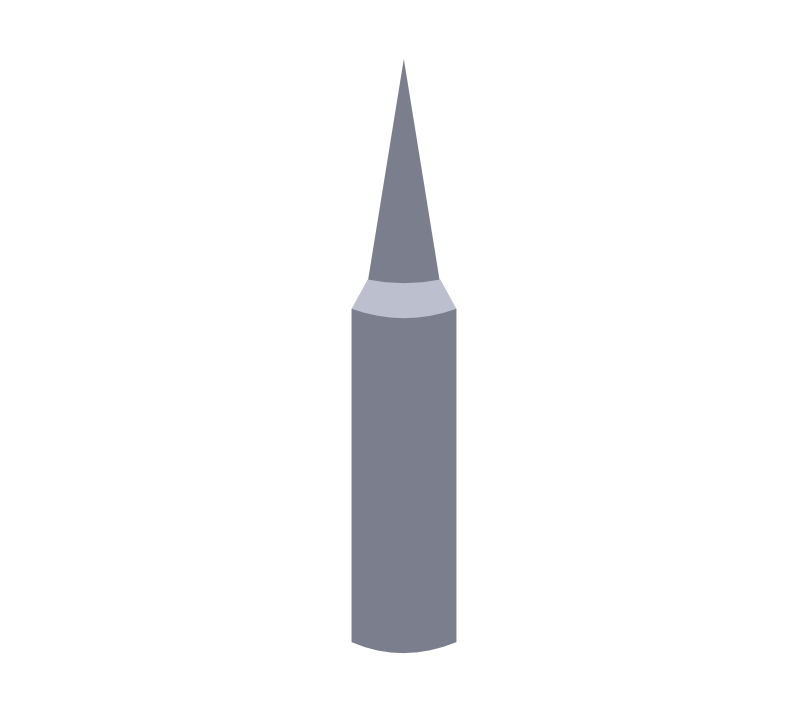
Conical Tip
A conical tip has a fine, pointed shape that focuses heat on a very small area, making it ideal for precise soldering in confined spaces. While it may seem like a good solution for reaching tight spots, its inefficient heat transfer often limits its practical use.
It works
well for small pads and quick SMD touch-ups, but due to the minimal
contact area, it struggles to deliver enough heat to larger joints.
Beginners should handle it carefully! Applying too much pressure can easily damage the tip or lift pads from the board.
For most SMD work, a small chisel or bevel tip provides better heat control and overall efficiency.
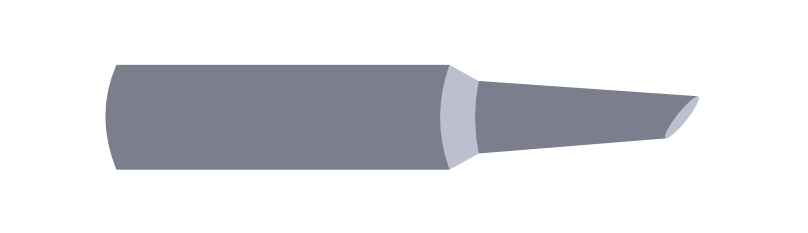
Miniwave Tip
The miniwave tip features a concave bevel that holds a small drop of solder at the end via surface tension. This makes it excellent for drag soldering SMD ICs with many legs. It allows fast, clean results even without a hot-air station but requires some skill and practice. It’s also known as a “hoof tip” and is great for soldering small gauge wires or when a pre-loaded tip is helpful.

Sizing Matters!
Regardless of the shape, the tip should be appropriately sized for the task: too small, and it won’t transfer enough heat; too large, and you risk overheating components or lifting pads. A good rule of thumb for chisel tips is to use one that’s about 60% the width of the pad.
But we encourage you to try different types of tips to find the one which suits you the most.
Soldering Tip
As your DIY builds become more complex, you’ll might need more than one soldering tip for your projects. However, with so many types available choosing the right one can be confusing.
Here we give you an overview about the most common soldering tips and their applications.
You should pick a soldering iron from a reliable manufacturer, that offers multiple replacement tips. It's a good idea to use original tips for your iron, as not every tip works with every soldering iron and quality is absolute key.
Furthermore you should select tips which are made for lead-free soldering, more about this topic in the solder wire section.
Here is a overview of different types of solder iron tips

Chisel Tip
The most versatile and widely used shape.
A chisel tip has a flat, screwdriver-like end that offers excellent heat transfer due to its broad contact area. This makes the chisel tip the best tip for people starting with synth DIY.
It's ideal for through-hole components, header pins, wires, and desoldering with braid. The flat edge allows for even heating across pads and leads. For general electronics work, a 1.2–2 mm chisel tip is often the best starting point.
Conical Tip
A conical tip has a fine, pointed shape that focuses heat on a very small area, making it ideal for precise soldering in confined spaces. While it may seem like a good solution for reaching tight spots, its inefficient heat transfer often limits its practical use.
It works
well for small pads and quick SMD touch-ups, but due to the minimal
contact area, it struggles to deliver enough heat to larger joints.
Beginners should handle it carefully! Applying too much pressure can easily damage the tip or lift pads from the board.
For most SMD work, a small chisel or bevel tip provides better heat control and overall efficiency.
Miniwave Tip
The miniwave tip features a concave bevel that holds a small drop of solder at the end via surface tension. This makes it excellent for drag soldering SMD ICs with many legs. It allows fast, clean results even without a hot-air station but requires some skill and practice. It’s also known as a “hoof tip” and is great for soldering small gauge wires or when a pre-loaded tip is helpful.
Sizing Matters!
Regardless of the shape, the tip should be appropriately sized for the task: too small, and it won’t transfer enough heat; too large, and you risk overheating components or lifting pads. A good rule of thumb for chisel tips is to use one that’s about 60% the width of the pad.
But we encourage you to try different types of tips to find the one which suits you the most.
These guides are part of our effort to share practical knowledge about DIY synth building, tools, and Eurorack standards. We want them to be as clear and useful as possible, and we know there’s always room for improvement.
If you spot an error, think something could be explained better, or want to share your own DIY tips, please let us know. You can reach us at shop@exploding-shed.com or through our contact page .